An Introduction to Scratch Programming Language
Table of Contents
Introduction
I run a Code Club at my local library, where I teach kids how to code using Scratch. Scratch is a visual programming language that makes it easy for beginners to learn the basics of coding. I wanted to put together a guide for us to use with new students, hopefully it will be useful for you too! In this article, I will introduce you to Scratch and show you how to create your first project.
What is Scratch
Scratch is a fun and easy way to start learning how to code! It is a visual programming language that lets you create your own stories, games, and animations by building up a set of blocks to create a program. Scratch is designed to help children learn the basics of coding in a simple and engaging way.
What can Scratch be used for?
Scratch is used to create interactive projects, including:
- Games
- Animations
- Stories
- Digital Art
The Scratch User Interface
The Scratch interface is designed to be simple and easy to use. It has four main parts:
- Block palette: Contains different types of coding blocks that tell sprites what to do.
- Coding Area: This is where you build your program by dragging blocks from the blocks palette and snapping them together to create a script.
- Stage: This is where you see your project in action.
- Sprites: These are the characters or objects in your project. Each sprite can be programmed to move, change, and react to events.
Some other important features of Scratch include:
- Blocks: These are the puzzle pieces that you use to create code.
- Start/Stop buttons: The green flag starts the program, and the red stop sign stops it.
- Backdrops: The backdrop is the background of your stage. You can change it to set the scene for your project.

The Scratch User Interface
Using blocks to code
Scratch uses coloured blocks that snap together like puzzle pieces to create code. These blocks are grouped into different categories:
- Motion: Makes sprites move.
- Looks: Changes the appearance of sprites.
- Sound: Adds sound effects and music.
- Events: Describes when the code will start.
- Control: Helps commands repeat or decide when to run.
- Sensing: Helps sprites react to the environment.
- Operators: Compare values and perform calculations.
- Variables: Stores information that can be used later.
- Lists: Allows you to hold multiple pieces of information.
- My Blocks: Create custom blocks.
When multiple blocks are connected together they form a script, which tells the sprites what to do in order.
Building Your First Project
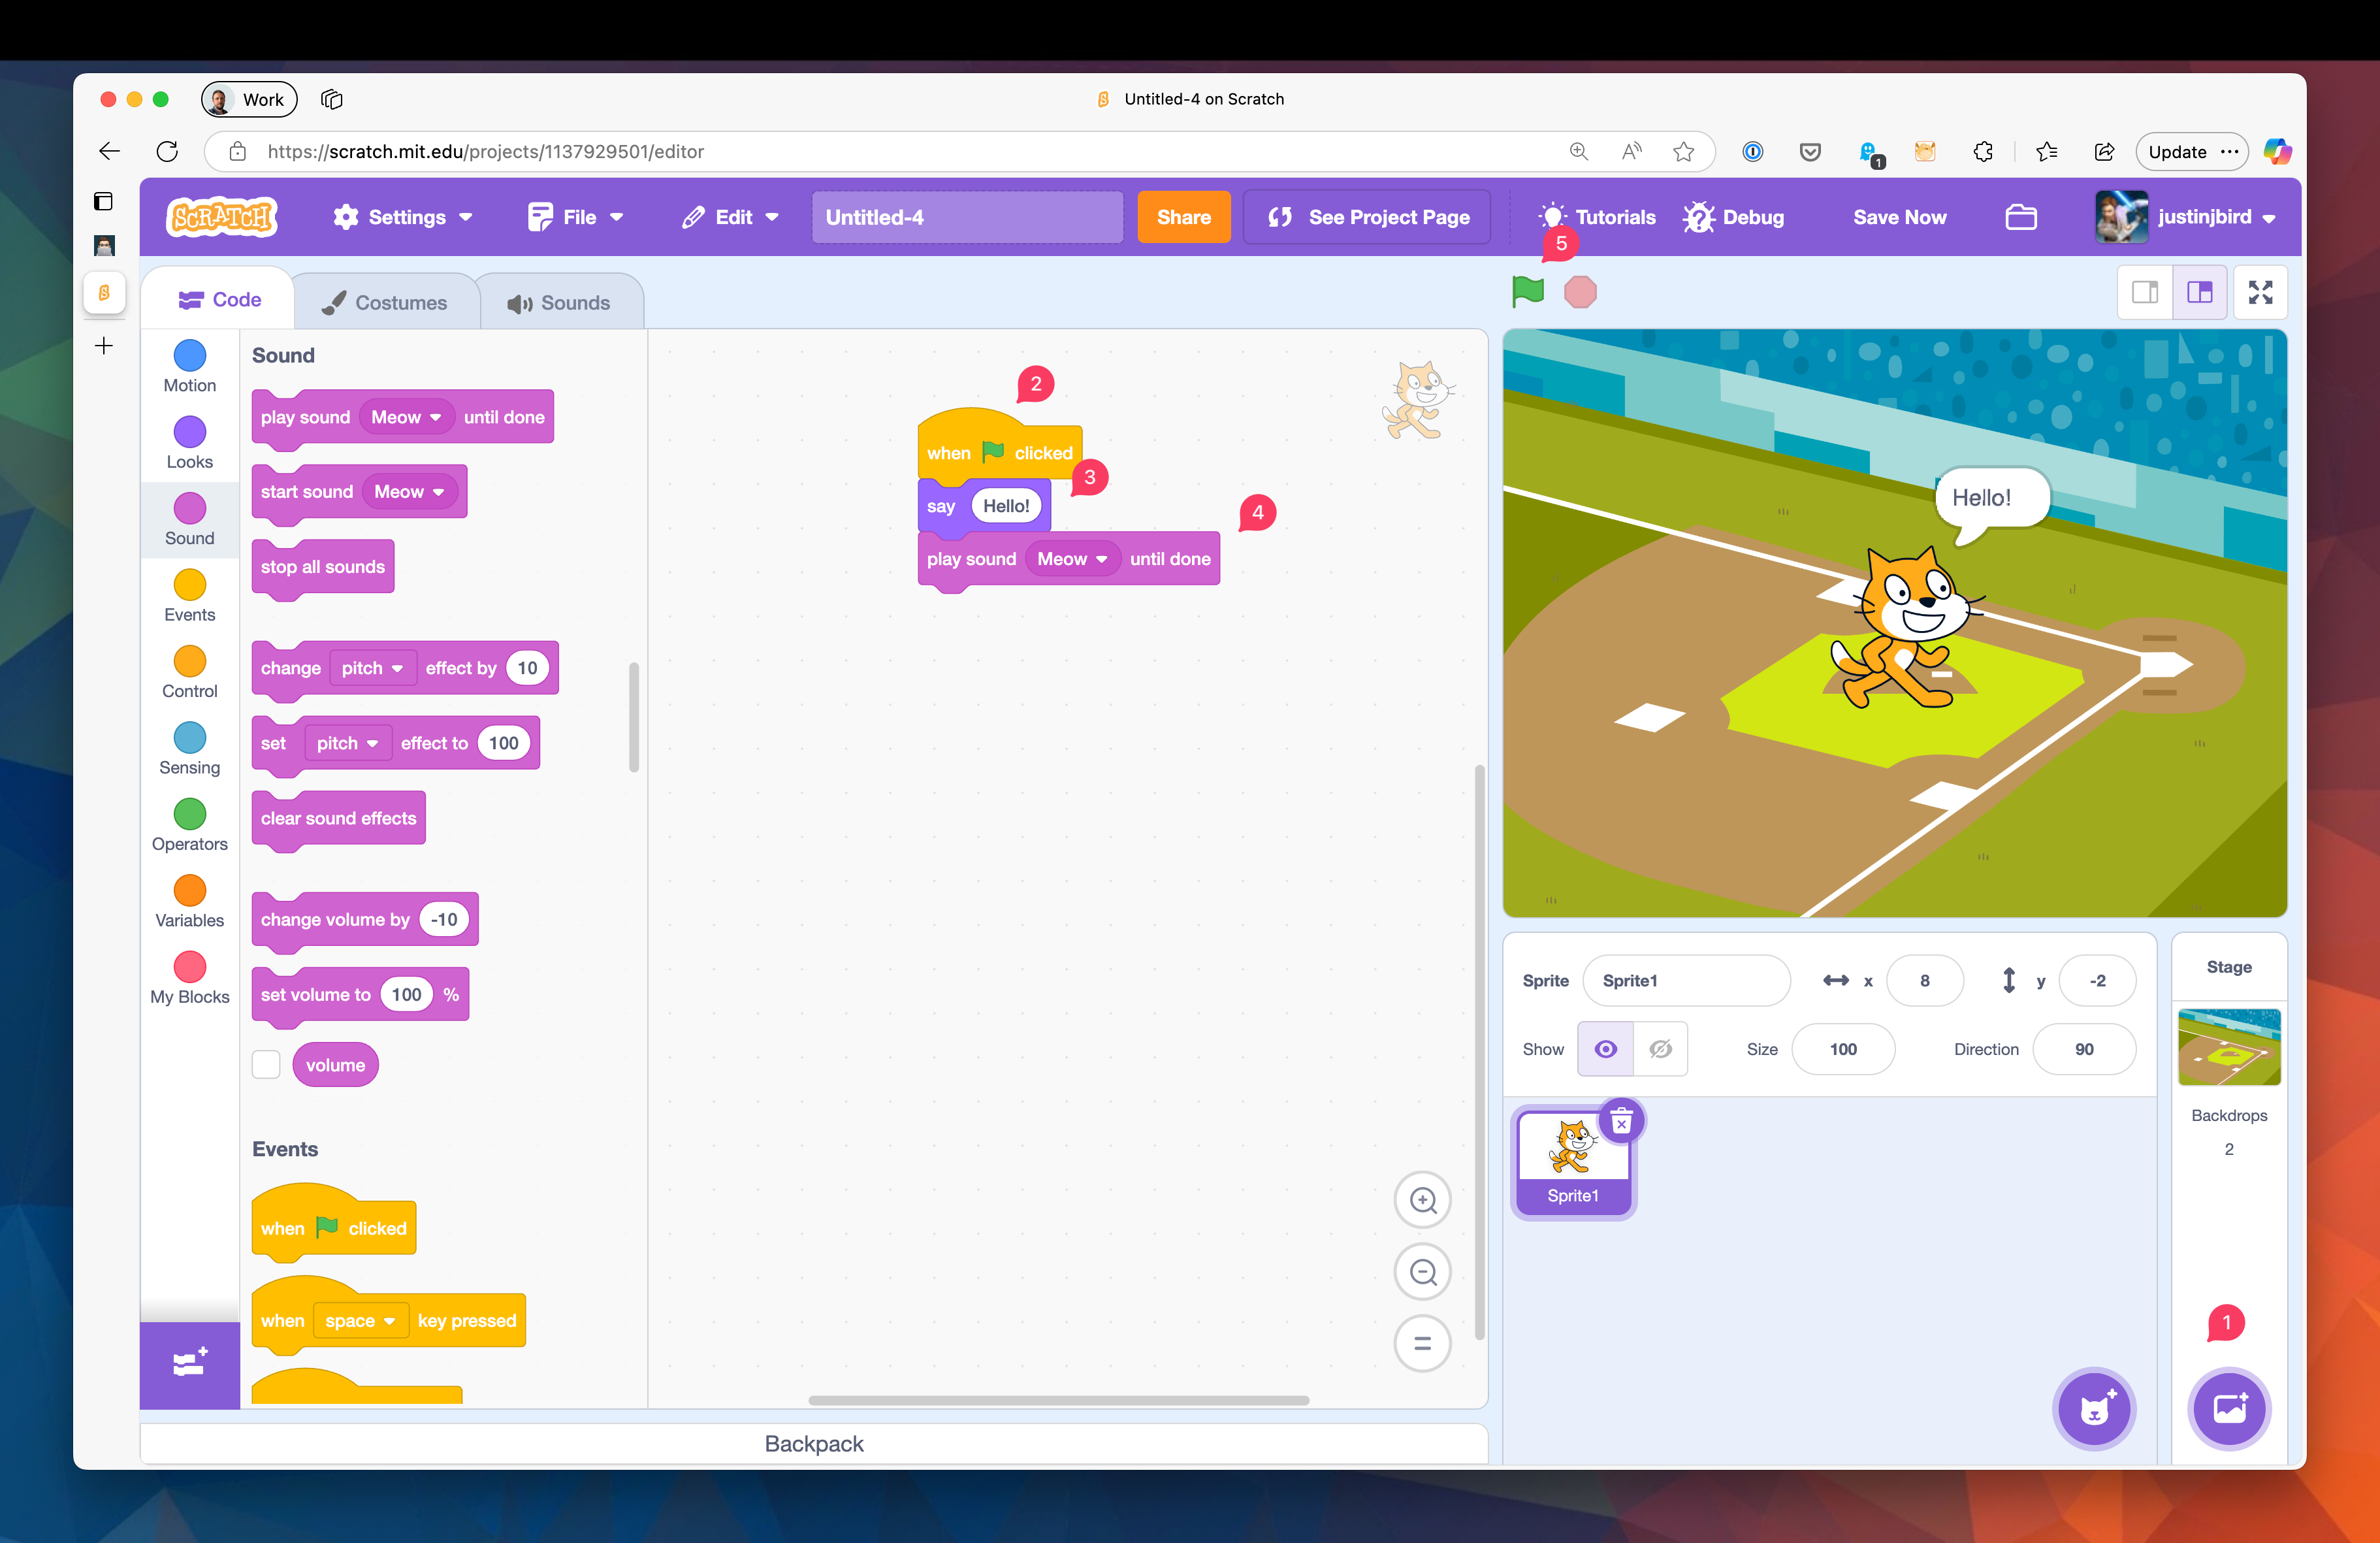
To start a new Scratch project, open Scratch and go to the Create page:
- Pick a backdrop for your project by clicking on the add backdrop button.
- Drag the when green flag clicked block from the events category to the coding area.
- Drag the say hello block from the looks category and attach it to the when green flag clicked block.
- Drag the play sound meow until done block from the sound category and attach it to the say hello block.
- Click the green flag to run your program!
Experiment with different blocks and see what you can create!
Conclusion
Scratch is a great way to start coding because it is visual, interactive, and fun. By learning how to use sprites, backdrops, and coding blocks, you can create amazing projects and develop problem-solving skills. Keep exploring, experimenting, and most importantly—have fun coding!
References

#mtfbwy