Learning to Hugo Part 5: Azure Static Webapp
- hugo
- 2021-05-10
- 8 minutes to read
This post is over 12 months old and Hugo is evolving. Please be mindful of that when reading this post as it could be outdated. I try to keep on top of changes where possible. I try to keep things up to date, but if you think something needs updating, please let me know in the comments.
Intro
This is the fifth part of the learning to Hugo series detailing my journey to getting this site up and running! I'm also using Hugo to configure my business website. In typical dev style, I just installed Hugo and got going. I have learnt a few things along the way that have improved my development time and hopefully these things will help you.
In this section I'm going to explain how to set up a static webapp to host my hugo site.
Health & safety warning
I'm no web dev! My world is data and so this stuff is outside my area of expertise. I'm learning as I go and so the info I'm sharing is my interpretation of that in a way that makes sense for me as a data-person-doing-web-dev. Some of the technical aspects might be a little misunderstood and I'd love to hear from you in the comments if you think there's a better way or if I've misunderstood a concept. Hopefully outlining my understanding of it might make it easier for someone wanting to give it a go. If you want advanced CSS understanding or web development skills though these are not the posts you're looking for!

obi wan says these might not be the posts you're looking for
2023 update
I have been using Azure Static Web Apps for a few years now and identified a few issues. I recently moved to Netlify (not because of these issues I might add) which I will write about shortly. In the meantime, here are are the blog posts I wrote about the issues I had with Azure Static Web Apps:
- 404 redirects
- Environment specific config (I have not written this yet)
Prepare your repository
Before creating your static webapp, you need to push your changes to github so that it can be picked up by the webapp. I am not going to cover that here but note that it doesn’t matter if your repository is public or hidden, this will still work.
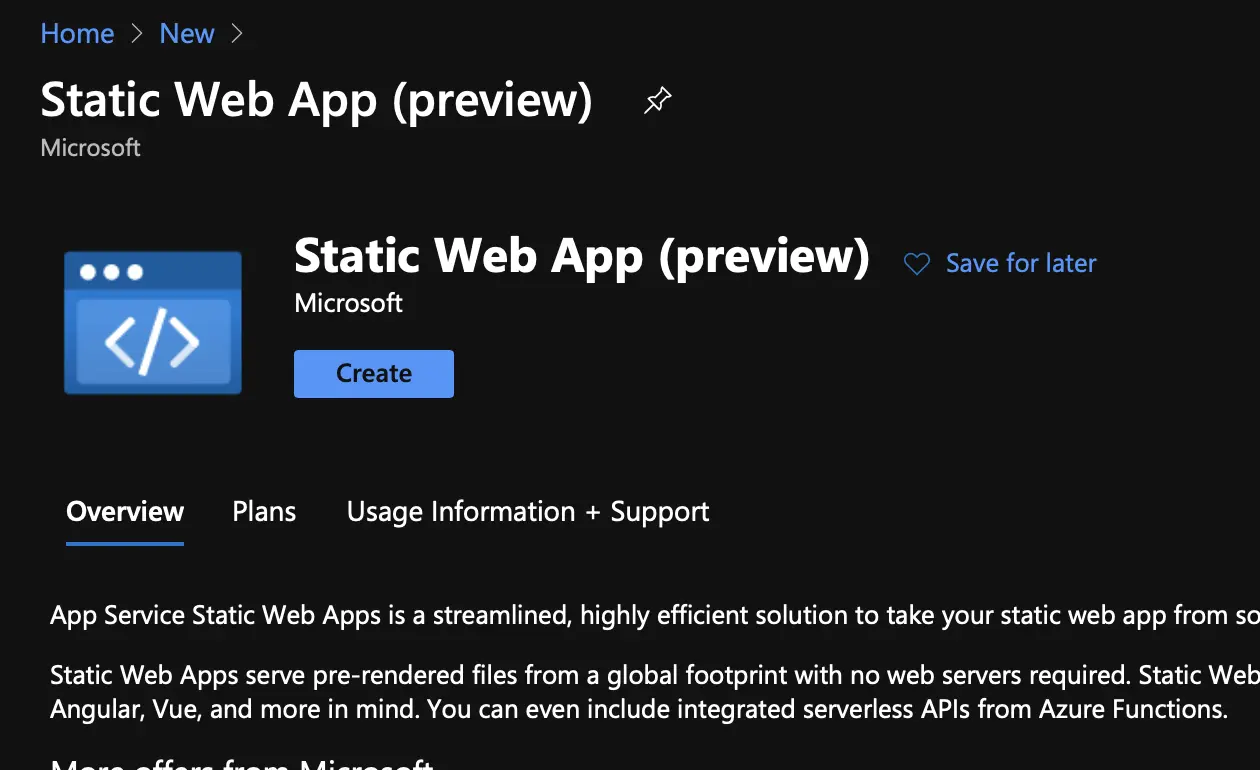
Provision a static webapp
Go to the Azure Portal and search for the static web apps option to create a new resource. At time of writing the service was still in preview…it probably isn’t by the time you come to read this.
First set of options are which subscription, which resource group, a name for your app and the region you want it hosted. The name given here just names the resource, it doesn’t have any affect on your published site.
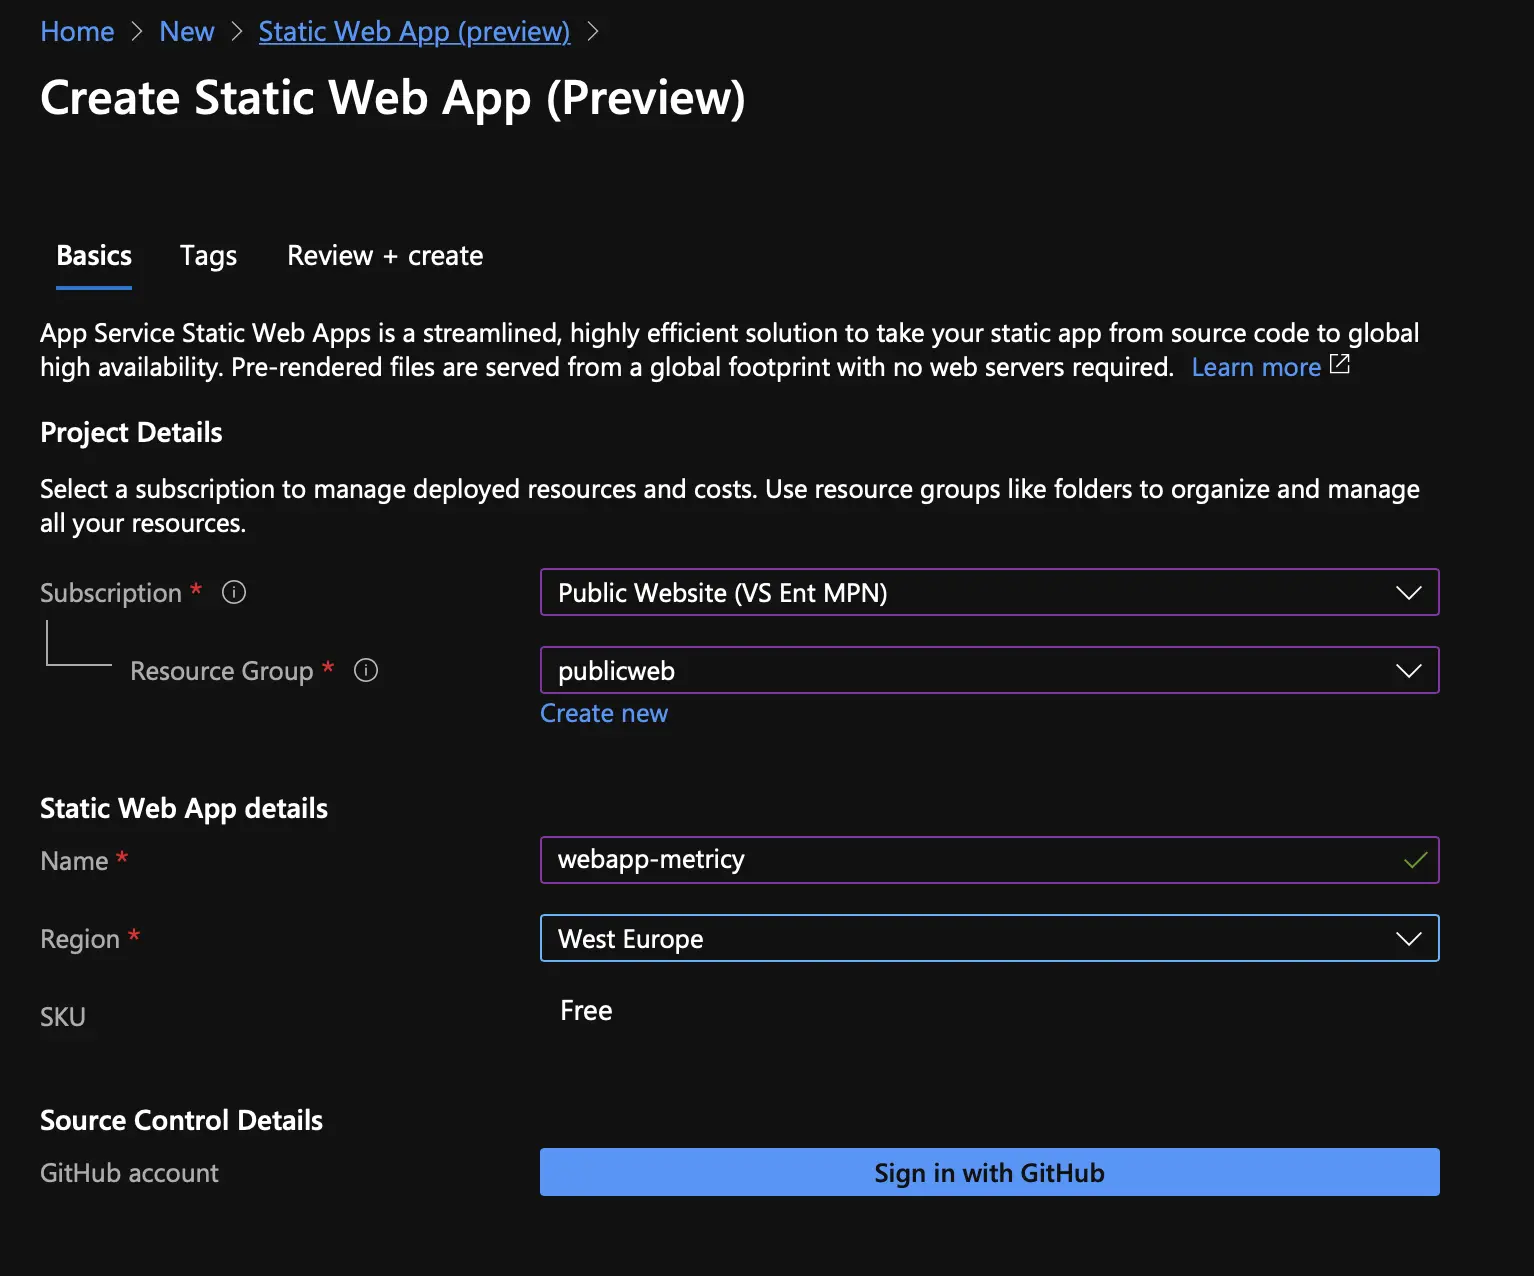
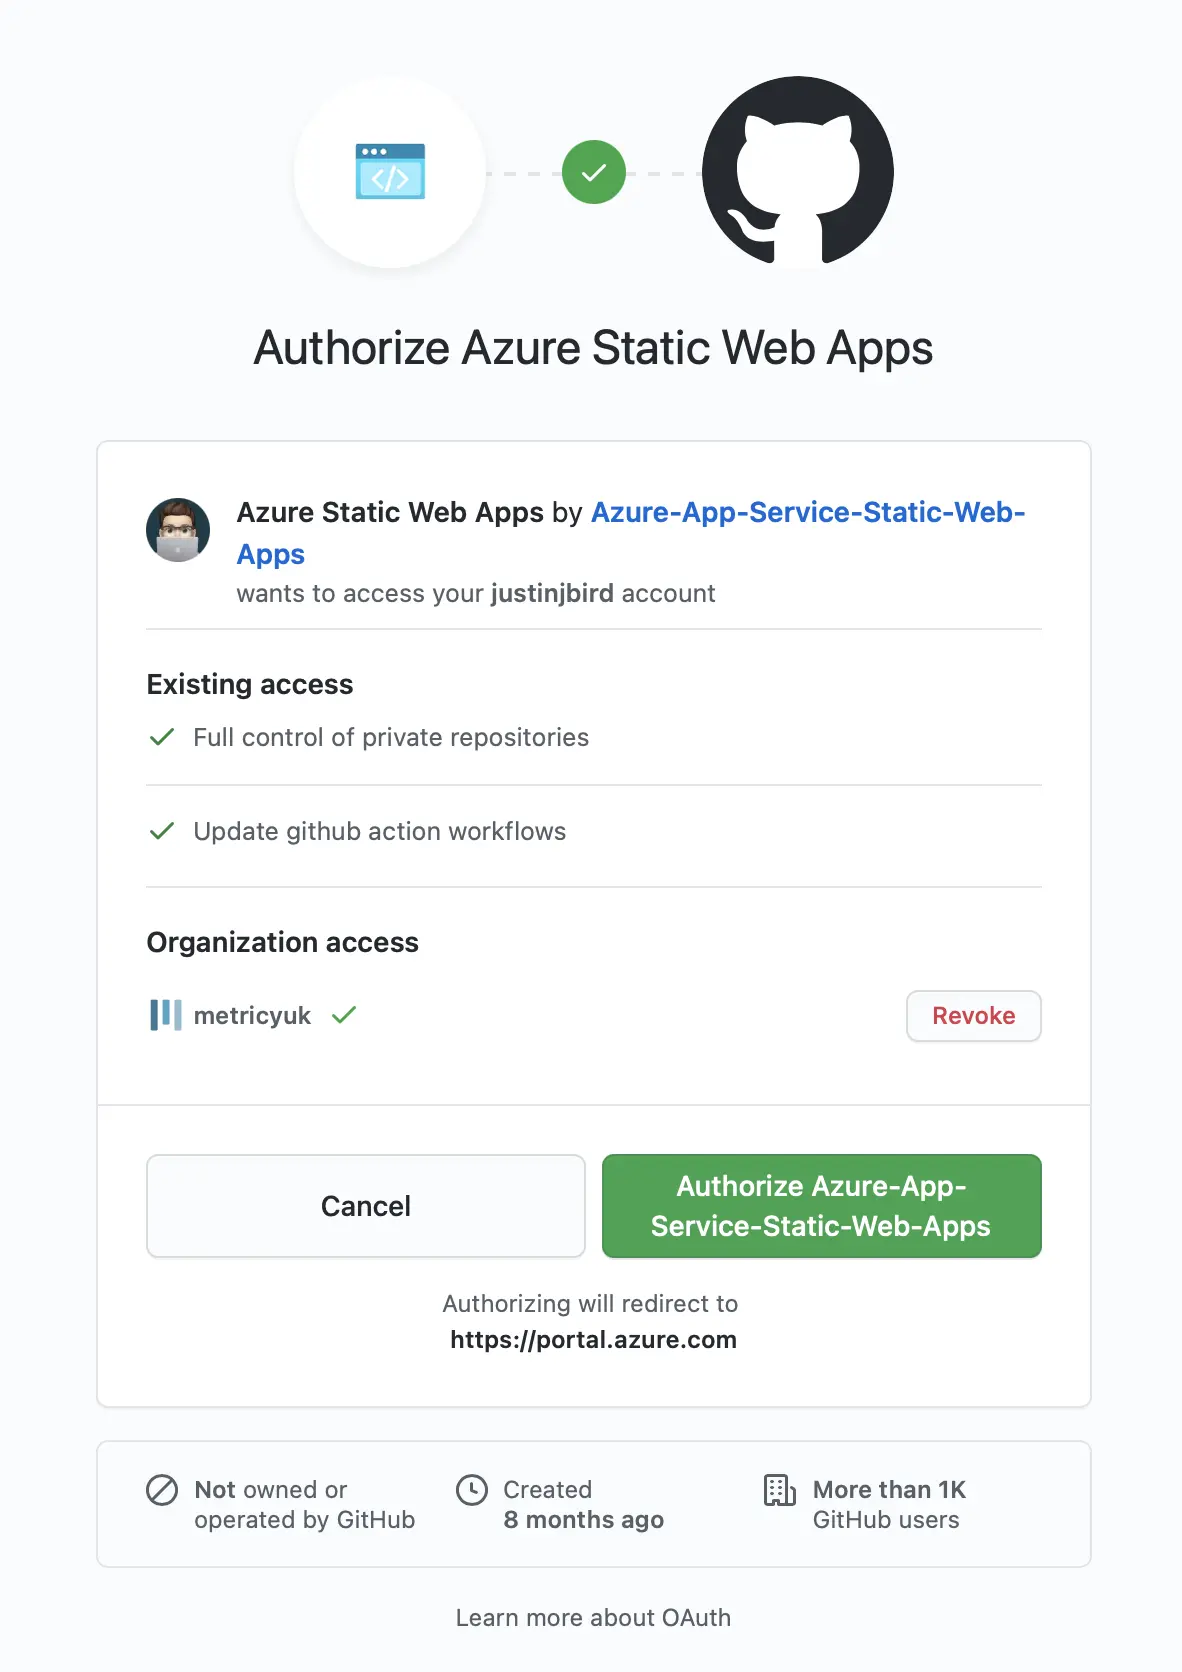
At the bottom of the first set of options, the app requests you to sign in with github, this is to permit the app to create workflows and assign secrets to your repository so that when you apply changes to your repository they are pushed to your webapp.
Once you have granted access to github, you can select the repository and branch you want to use. This simply means which branch will be used to deploy to the webapp, I am using the main branch of my repository.
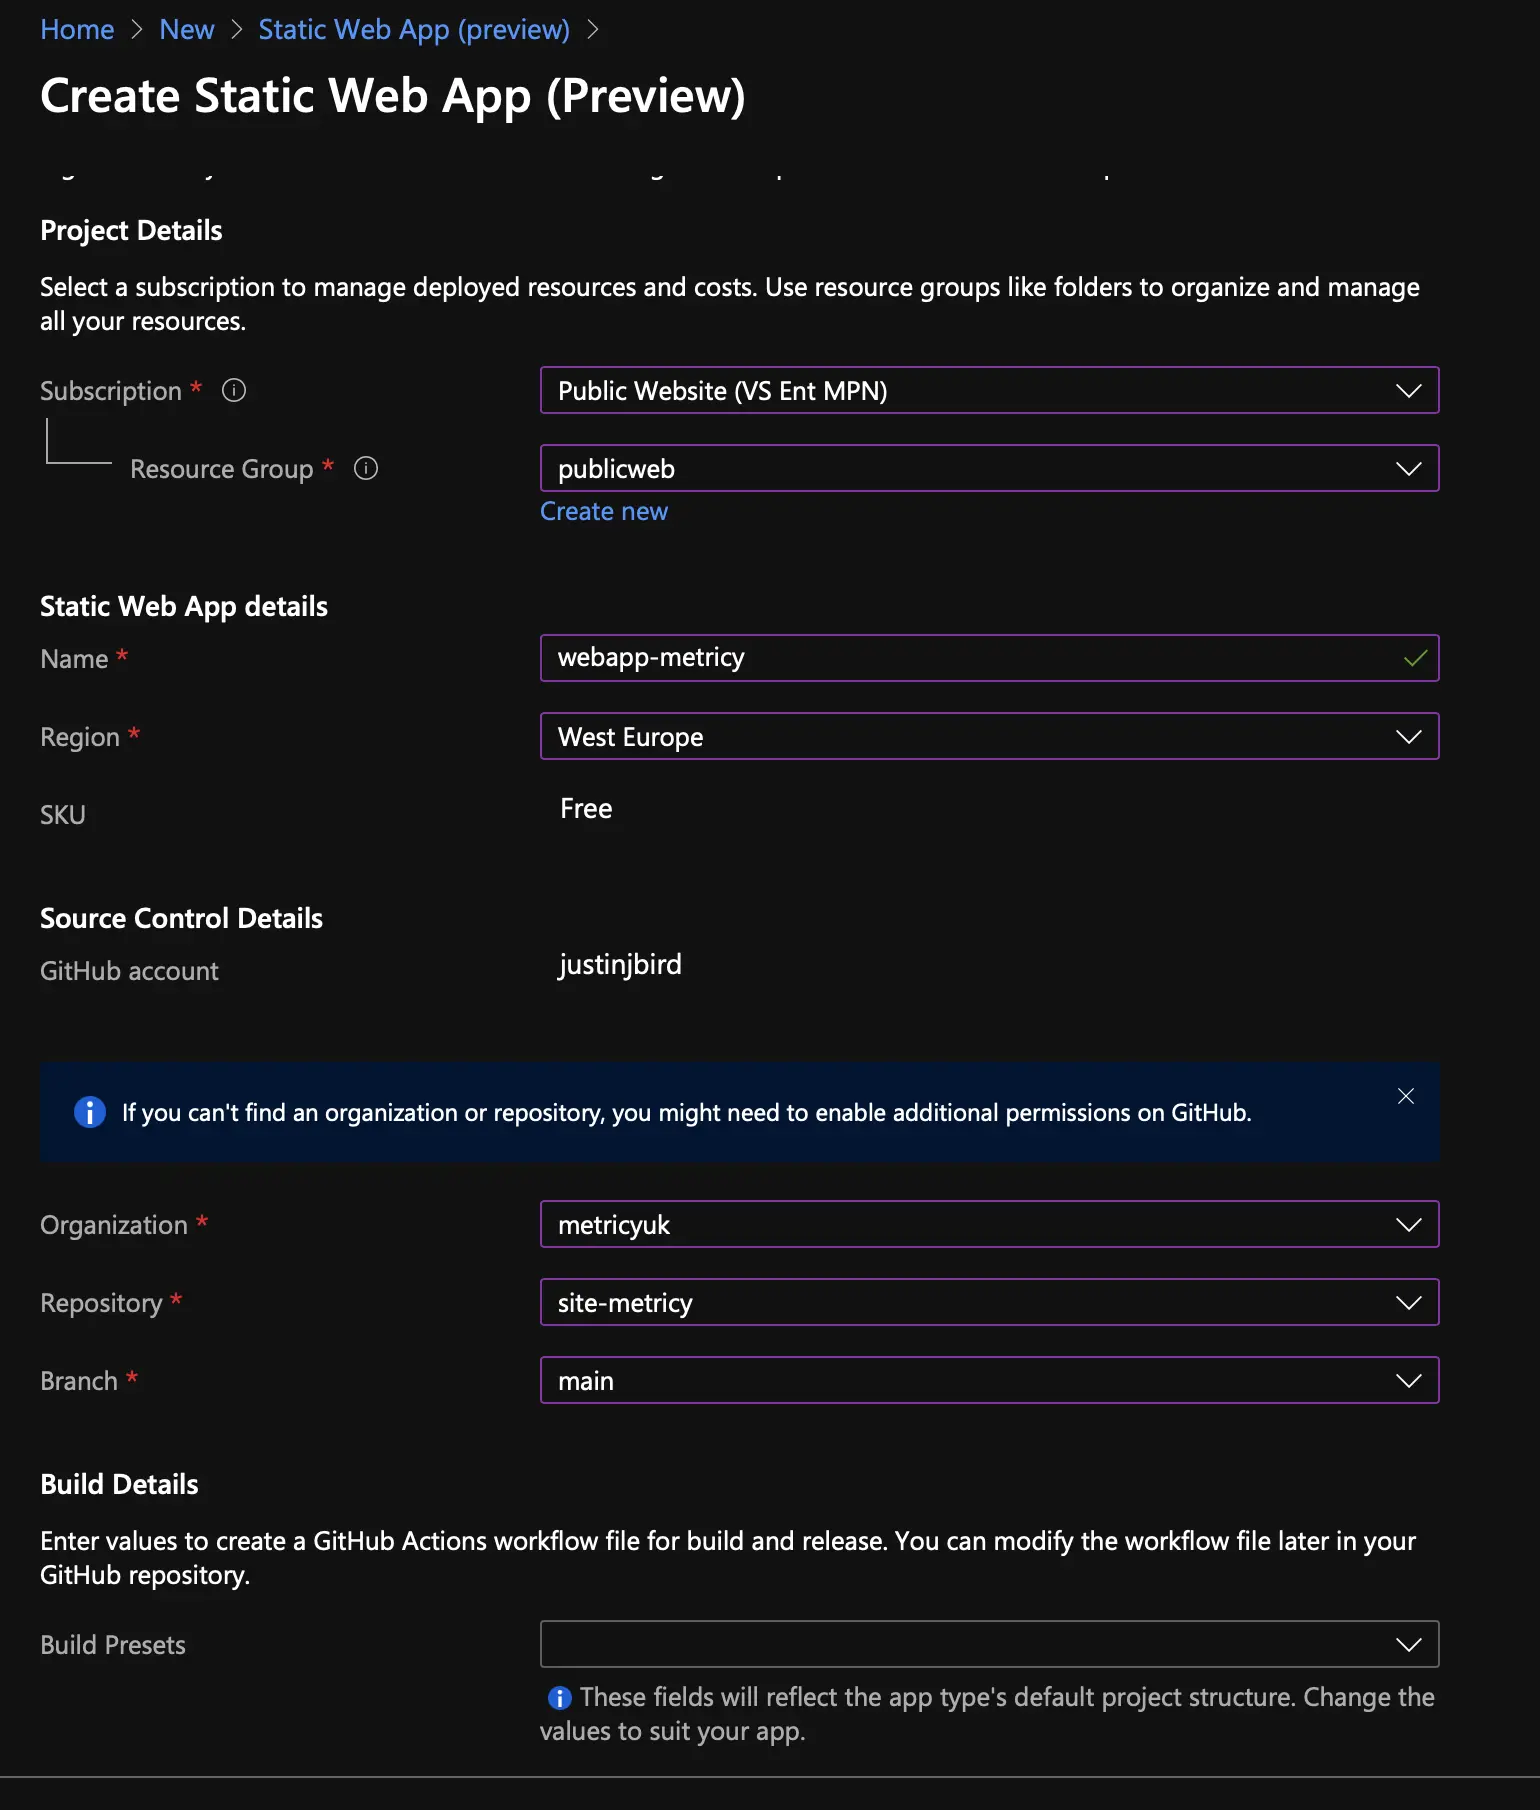
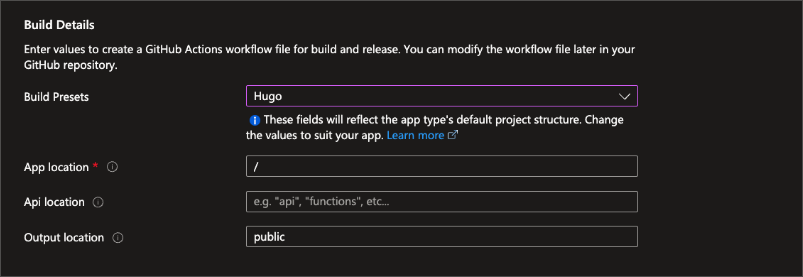
You then need to tell the static app which build presets need to be used. Since I am using Hugo, that is the preset I am going to use. The app location is the path to the root of your hugo files in the repository and the app artifact location is the directory in which the built version of the site will exist. By default, Hugo builds to the public folder.
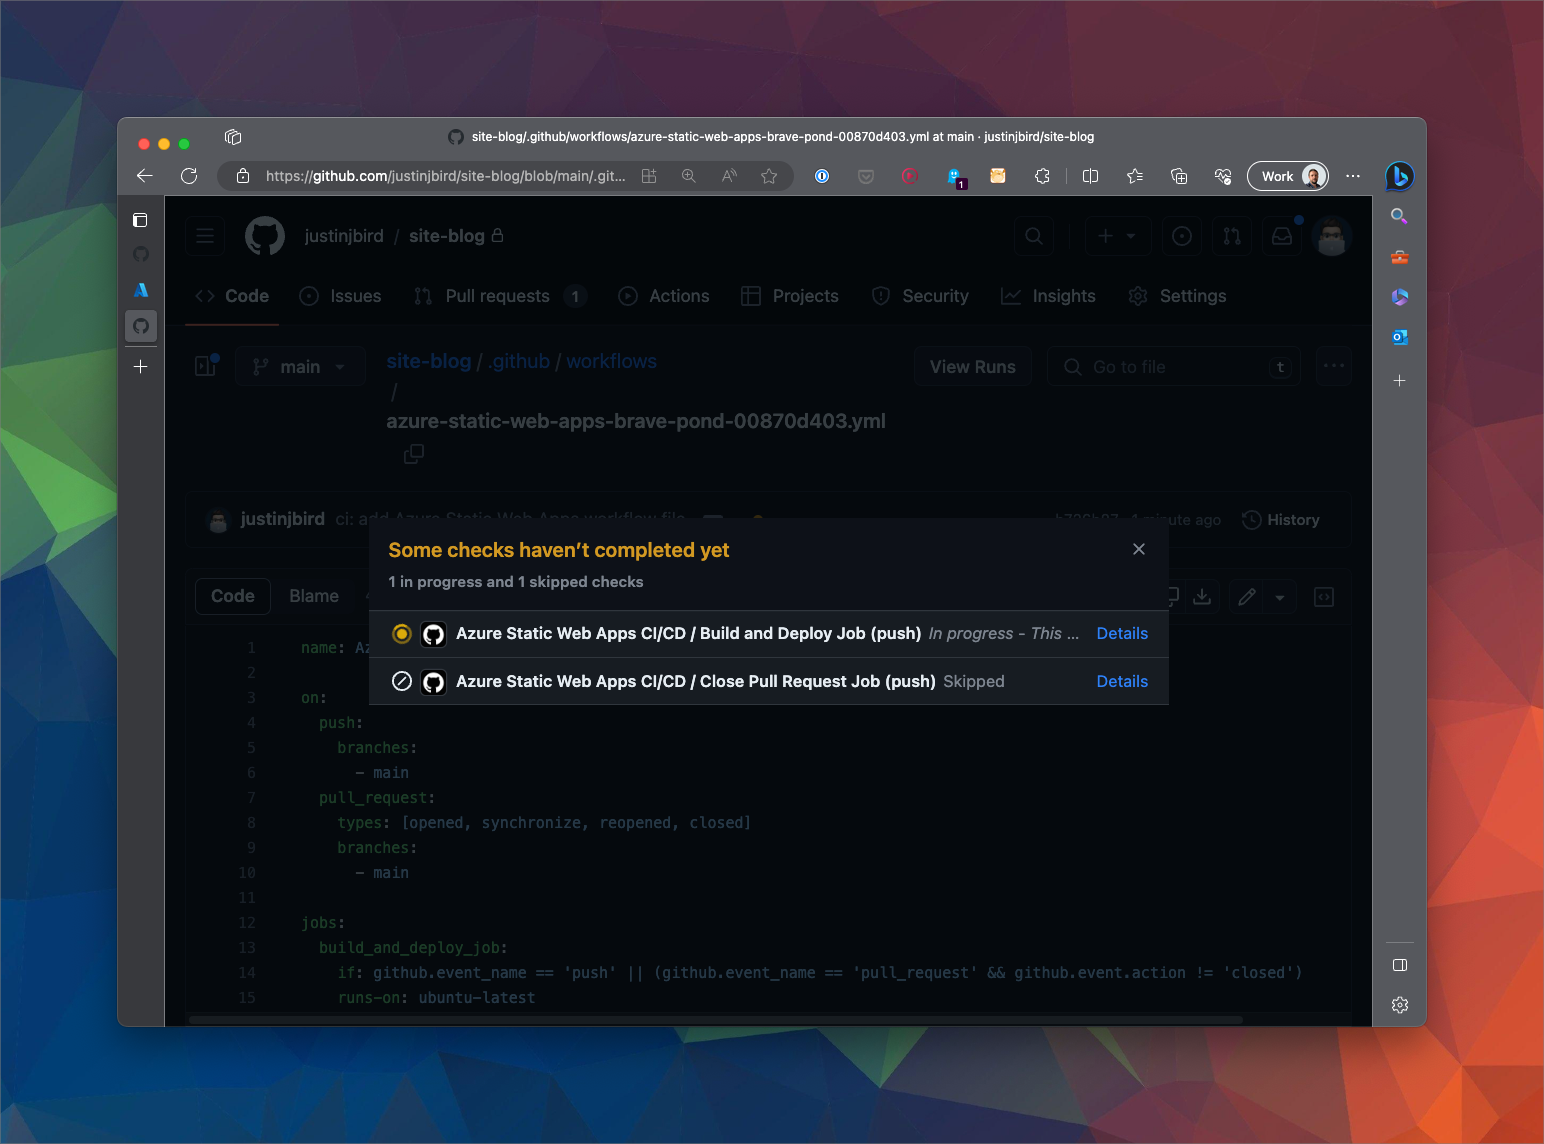
Once you have completed the configuration steps, the static app will be provisioned and workflow files will be created within your repository and the site will start being built. You can see the status of the build and deployment by opening the workflow file in your repository, a yellow dot indicates that the workflow is running, a green dot indicates that the workflow has completed successfully and a red dot indicates that the workflow has failed. In the screenshot below, you can see that the workflow is running.

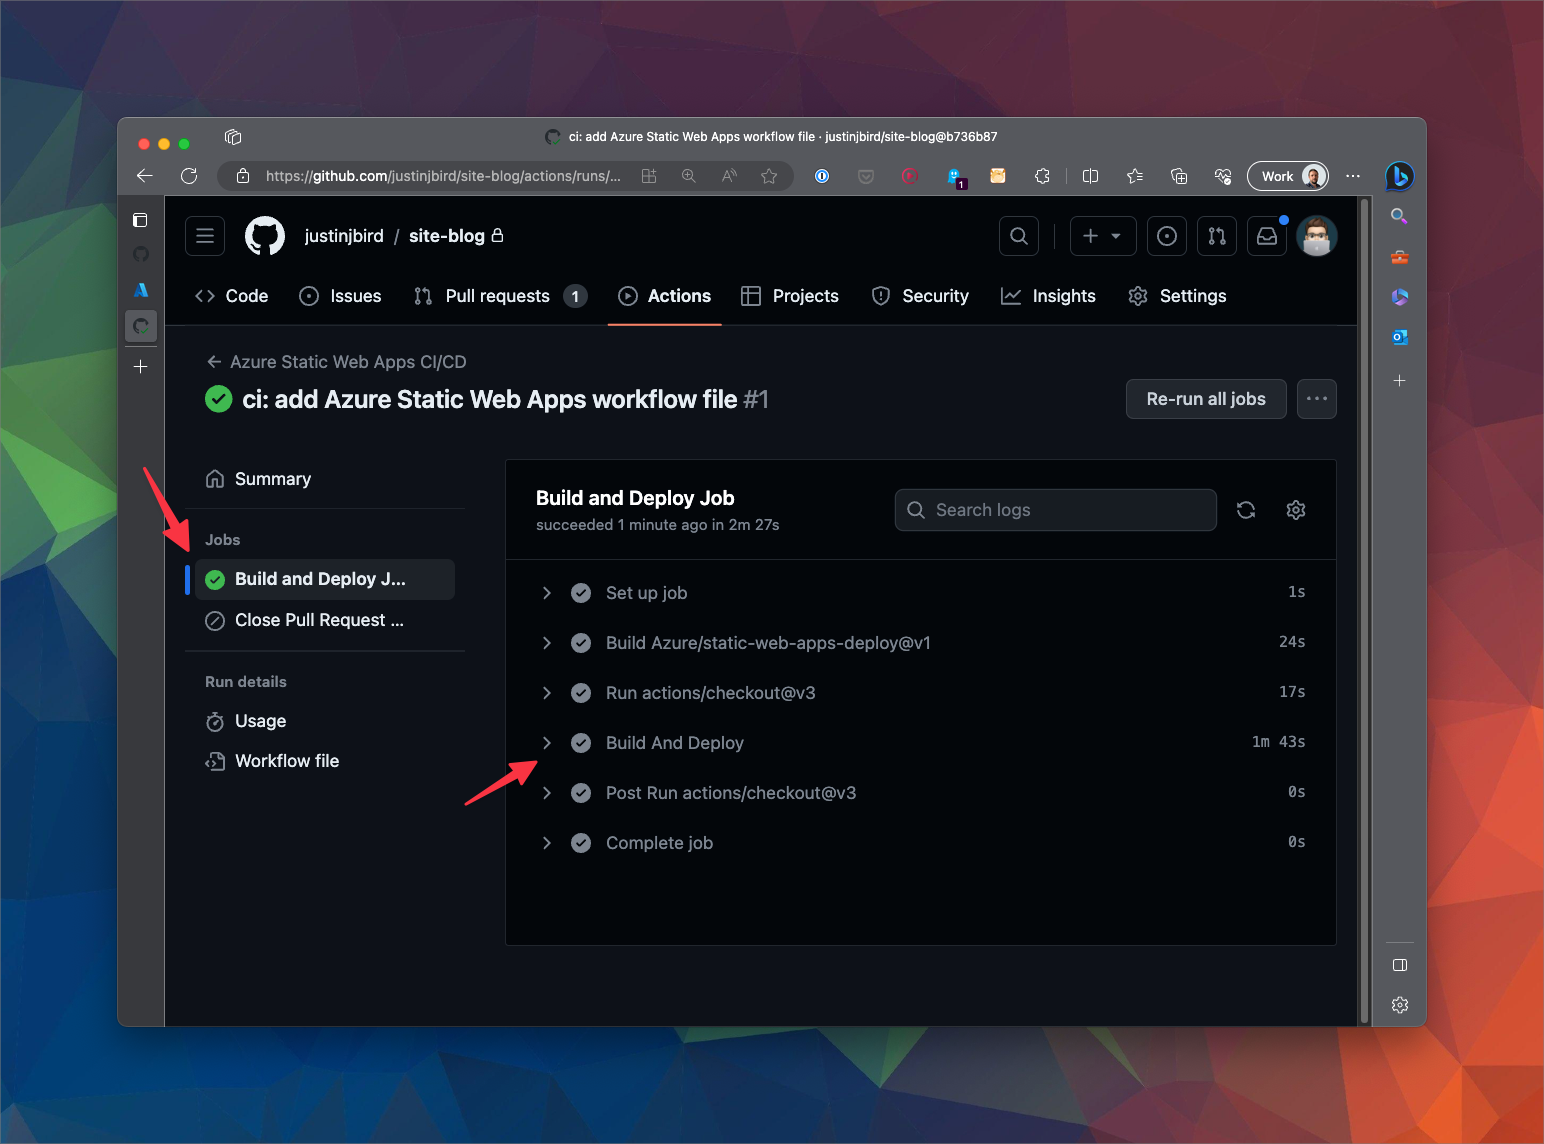
If I click on the dot I will get a summary of the steps that are running and the output of each step. In the screenshot below, you can see that the build step is running.
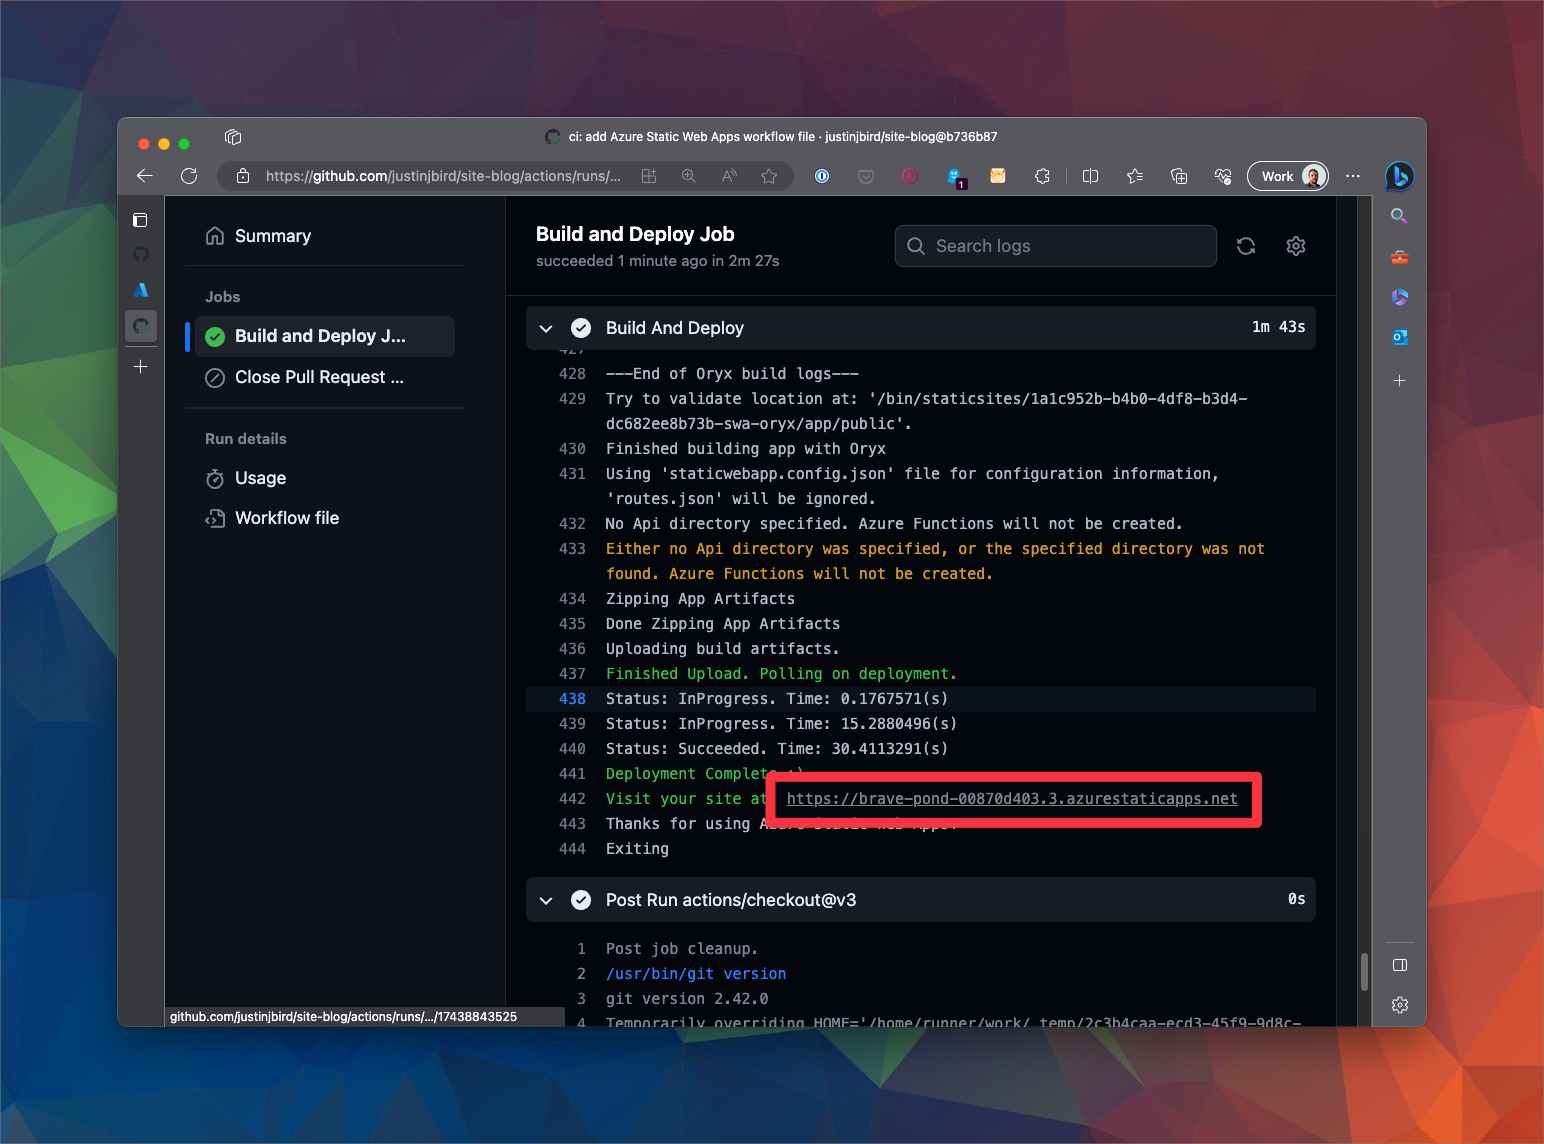
Clicking on the details link will show me more information of the build steps. Once the build is complete, a green tick will appear. Your static app will now be available to browse, but first we need to find the URL of the site! Each static app by default has a random url until you assign it to your own domain. You can find out what that url is in two ways. First, the build summary will show you the url of the site if you expand the build and deploy step…
Navigate all the way to the bottom of the summary where one of the final messages will show the URL…
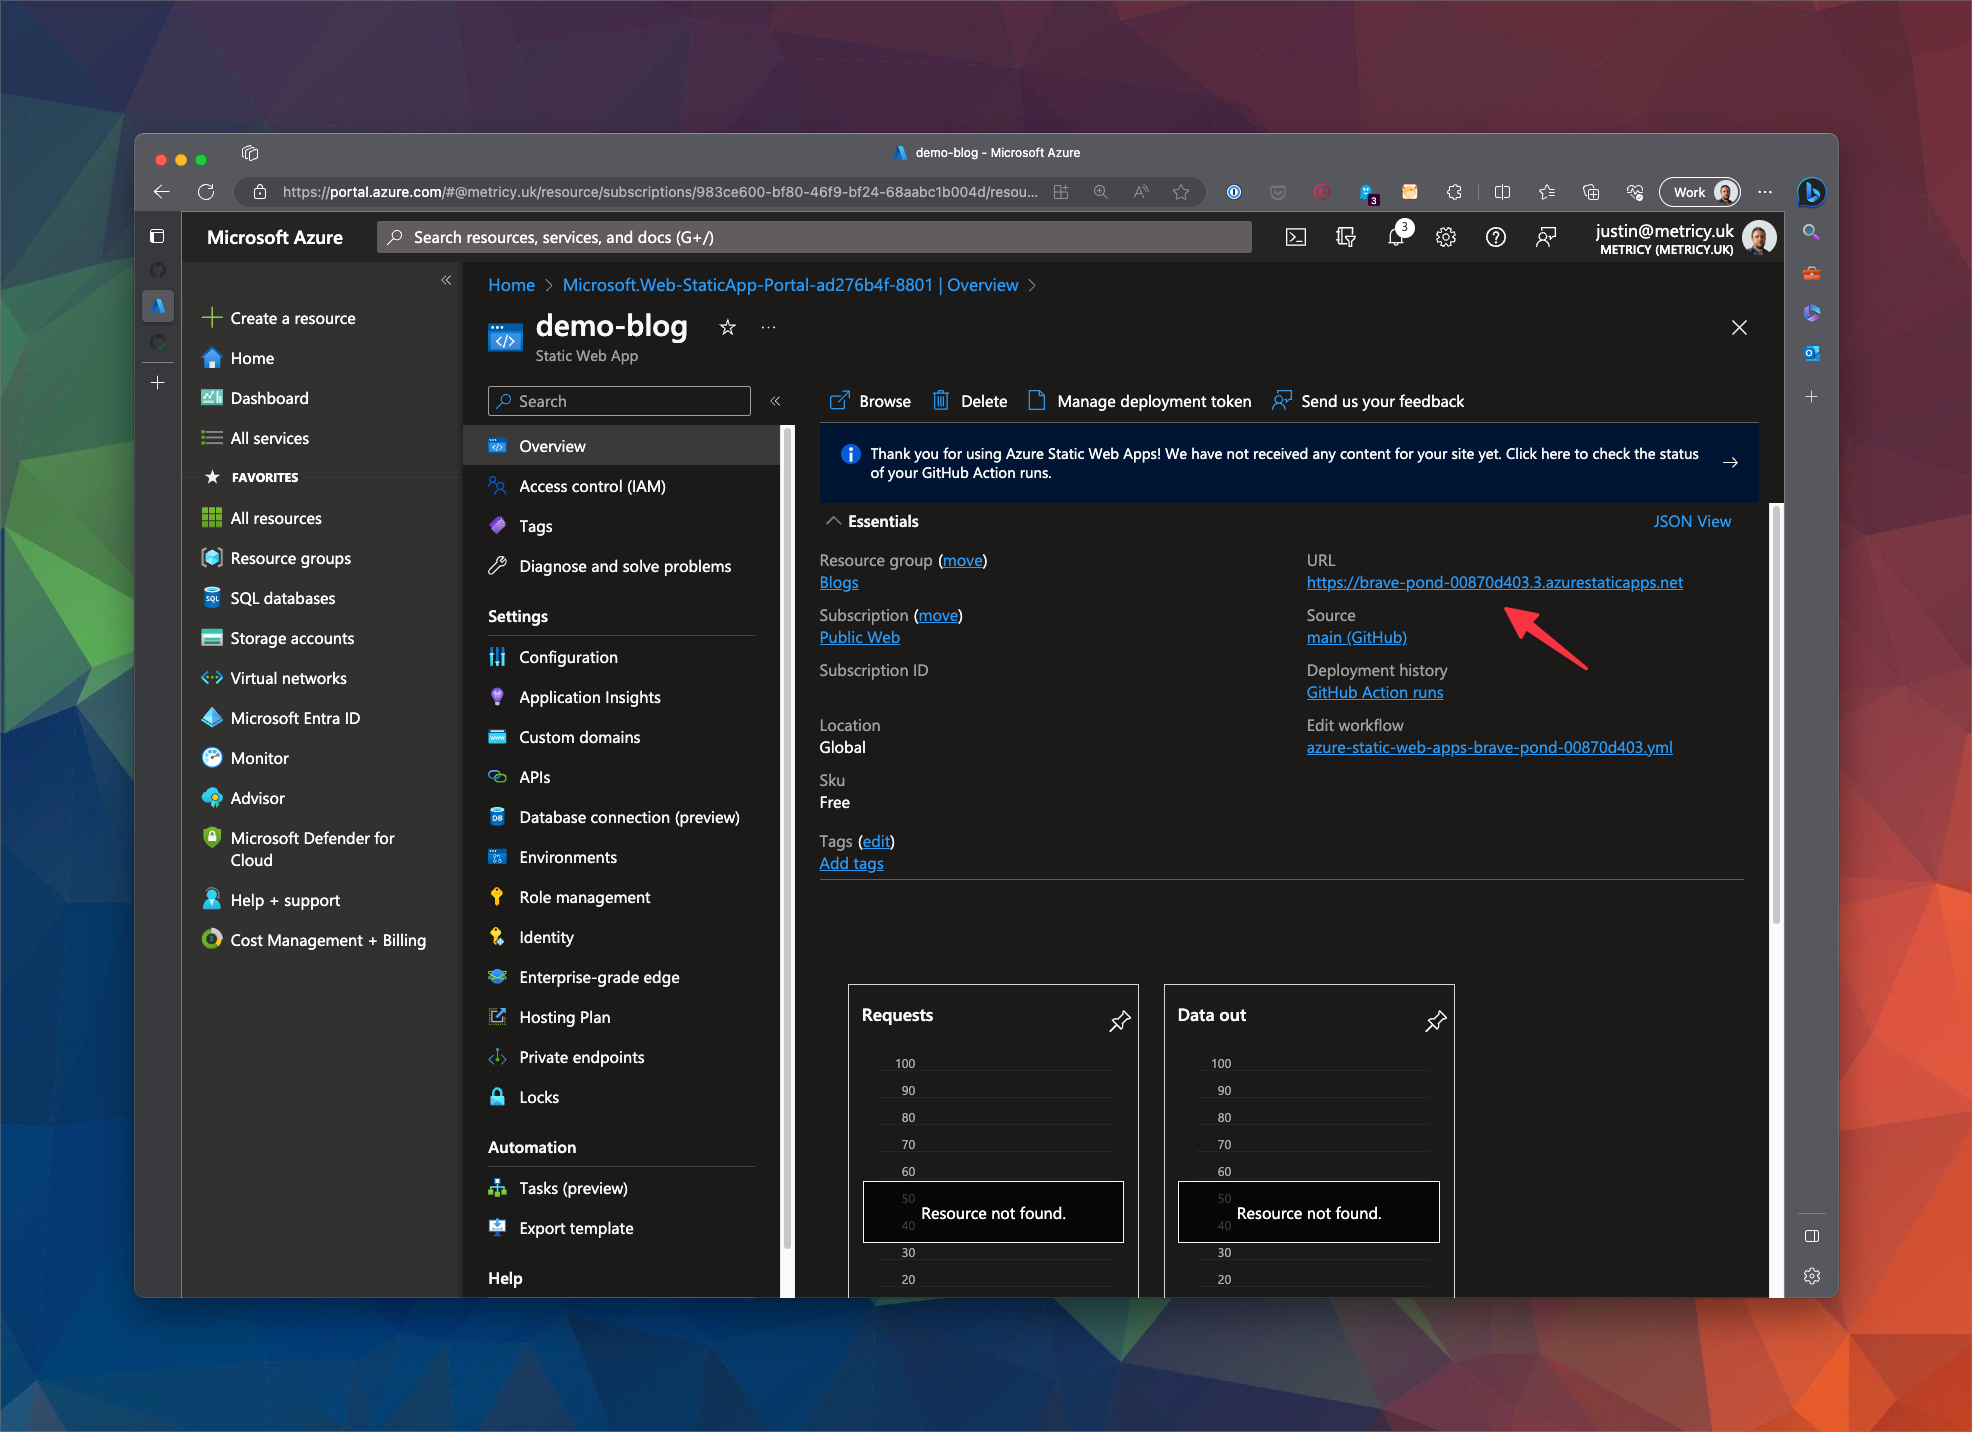
You can also find the url of your site from the summary section of the Azure resource…
Custom Domain
The next thing to do is to assign a custom domain to your site. Right now your site url will be something like https://brave-pond-00870d403.3.azurestaticapps.net and whilst that might be an interesting talking point, it’s not very memorable. So let’s assign a custom domain. I am not going to cover purchasing a domain, but hopefully you have a nice domain name to assign to your site. I am also going to walk through how to set this up using Cloudflare which I use across multiple sites. To use Cloudflare you need to change the nameservers of your domain to point to Cloudflare. If you don’t want to do this, you can use your domain provider to assign a CNAME record to your site. I expect the steps will be relatively similar.
Configuring CNAME records
Our objective here is to direct my preferred domain name https://justinjbird.me to where my site is hosted at https://brave-pond-00870d403.3.azurestaticapps.net, if you’re following along you need to use your new domain name and your static app url. Go to the DNS section and create two CNAME records. The first directs to your static app url and needs to be configured with www in the name…
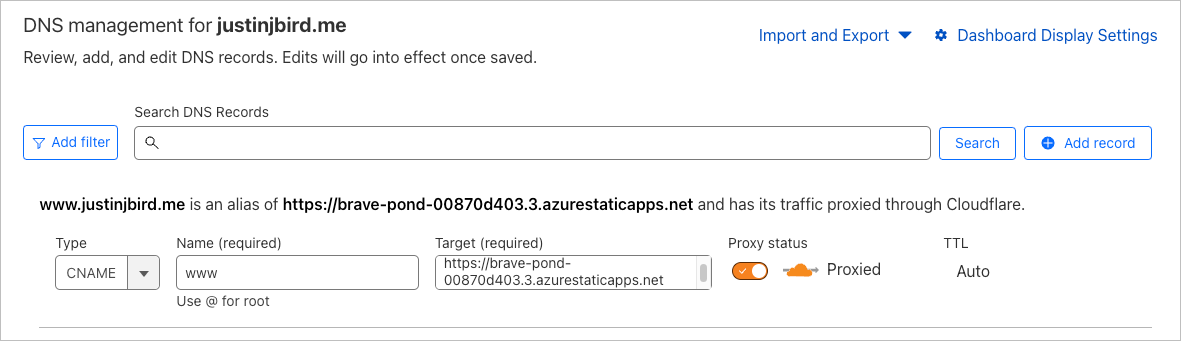
The second CNAME record will be set up to redirect the apex domain to the www domain. The name of the record will be the apex domain and the value will be the www domain. In my case, the name is @ (which represents root) and the value is www.justinjbird.me.
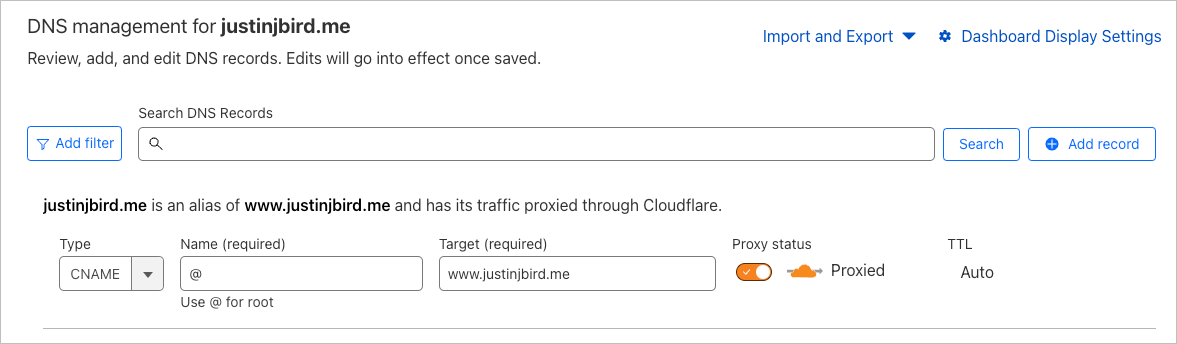
This is a neat trick that Cloudflare offers called CNAME flattening which allows you to redirect the apex domain to the www domain. This is useful because Azure Static Webapps doesn’t support apex domains.
Set up redirect rule
Last thing on Cloudflare is to set up a redirect rule. The purpose of this is to simply direct any url using the apex domain i.e. https://justinjbird.me to the corresponding page of the www domain i.e. https://www.justinjbird.me . To do this, go to the page rules section under rules. Create a new rule with the following settings
- URL =
justinjbird.me/* - Setting =
Forwarding URL - Status Code =
301 - Permanent Redirect - Destination URL =
https://www.justinjbird.me/$1

The purpose of this is to tell cloudflare that any URL that is targeted at https://justinjbird.me
should be sent to the same URL but with www in front of it. The pattern https://justinjbird.me/* means that any URL that starts with https://justinjbird.me/ will be captured and the $1 grabs everything within the wildcard and adds it to the www version of the url. So if someone navigates to https://justinjbird.me/2021/find-me-the-right-url they will be redirected to https://www.justinjbird.me/2021/find-me-the-right-url pretty cool huh?
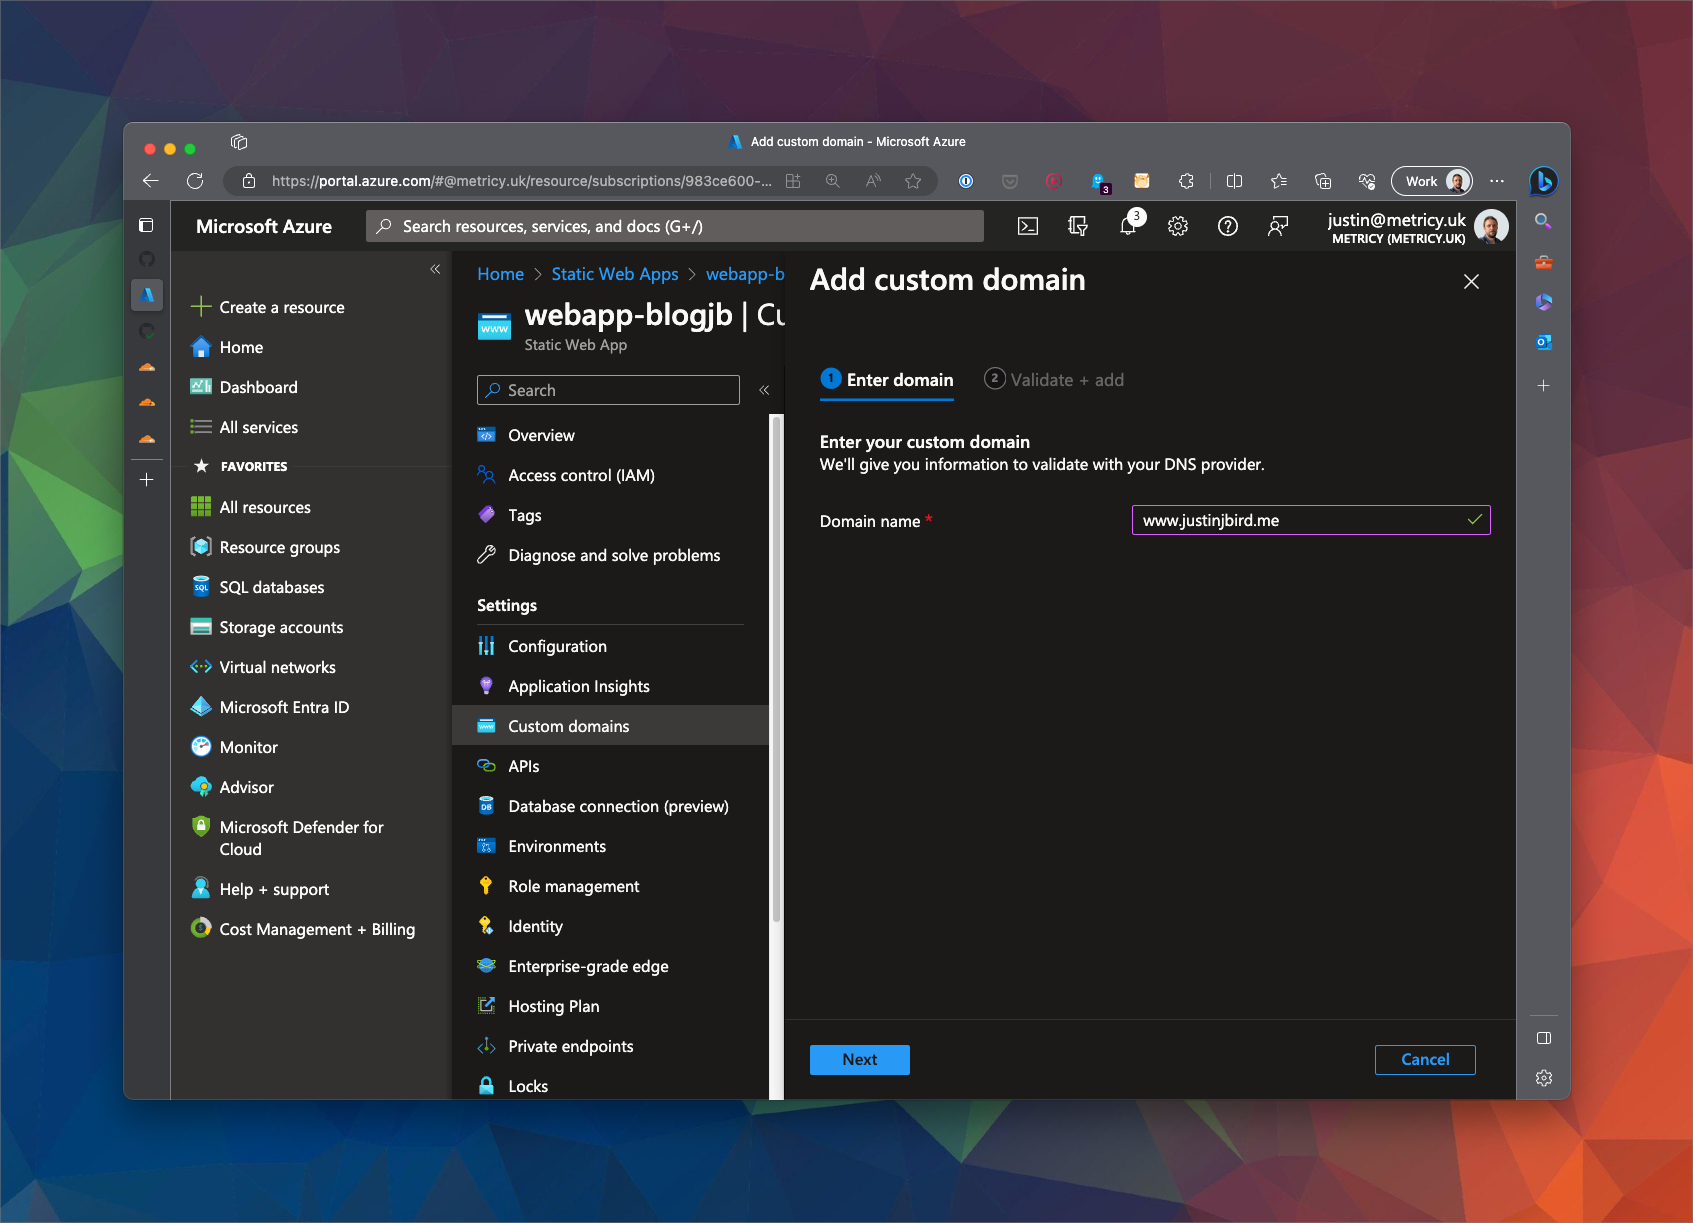
Assign domain to static app
Now that we have our domain set up, we need to assign it to our static app. Go to the custom domains section of your static app and add your domain name. For this section to work, you must have set up the CNAME records correctly. From the custom domains section I want to add a domain from another provider. The domain name must be the www version of the URL i.e. www.justinjbird.me…
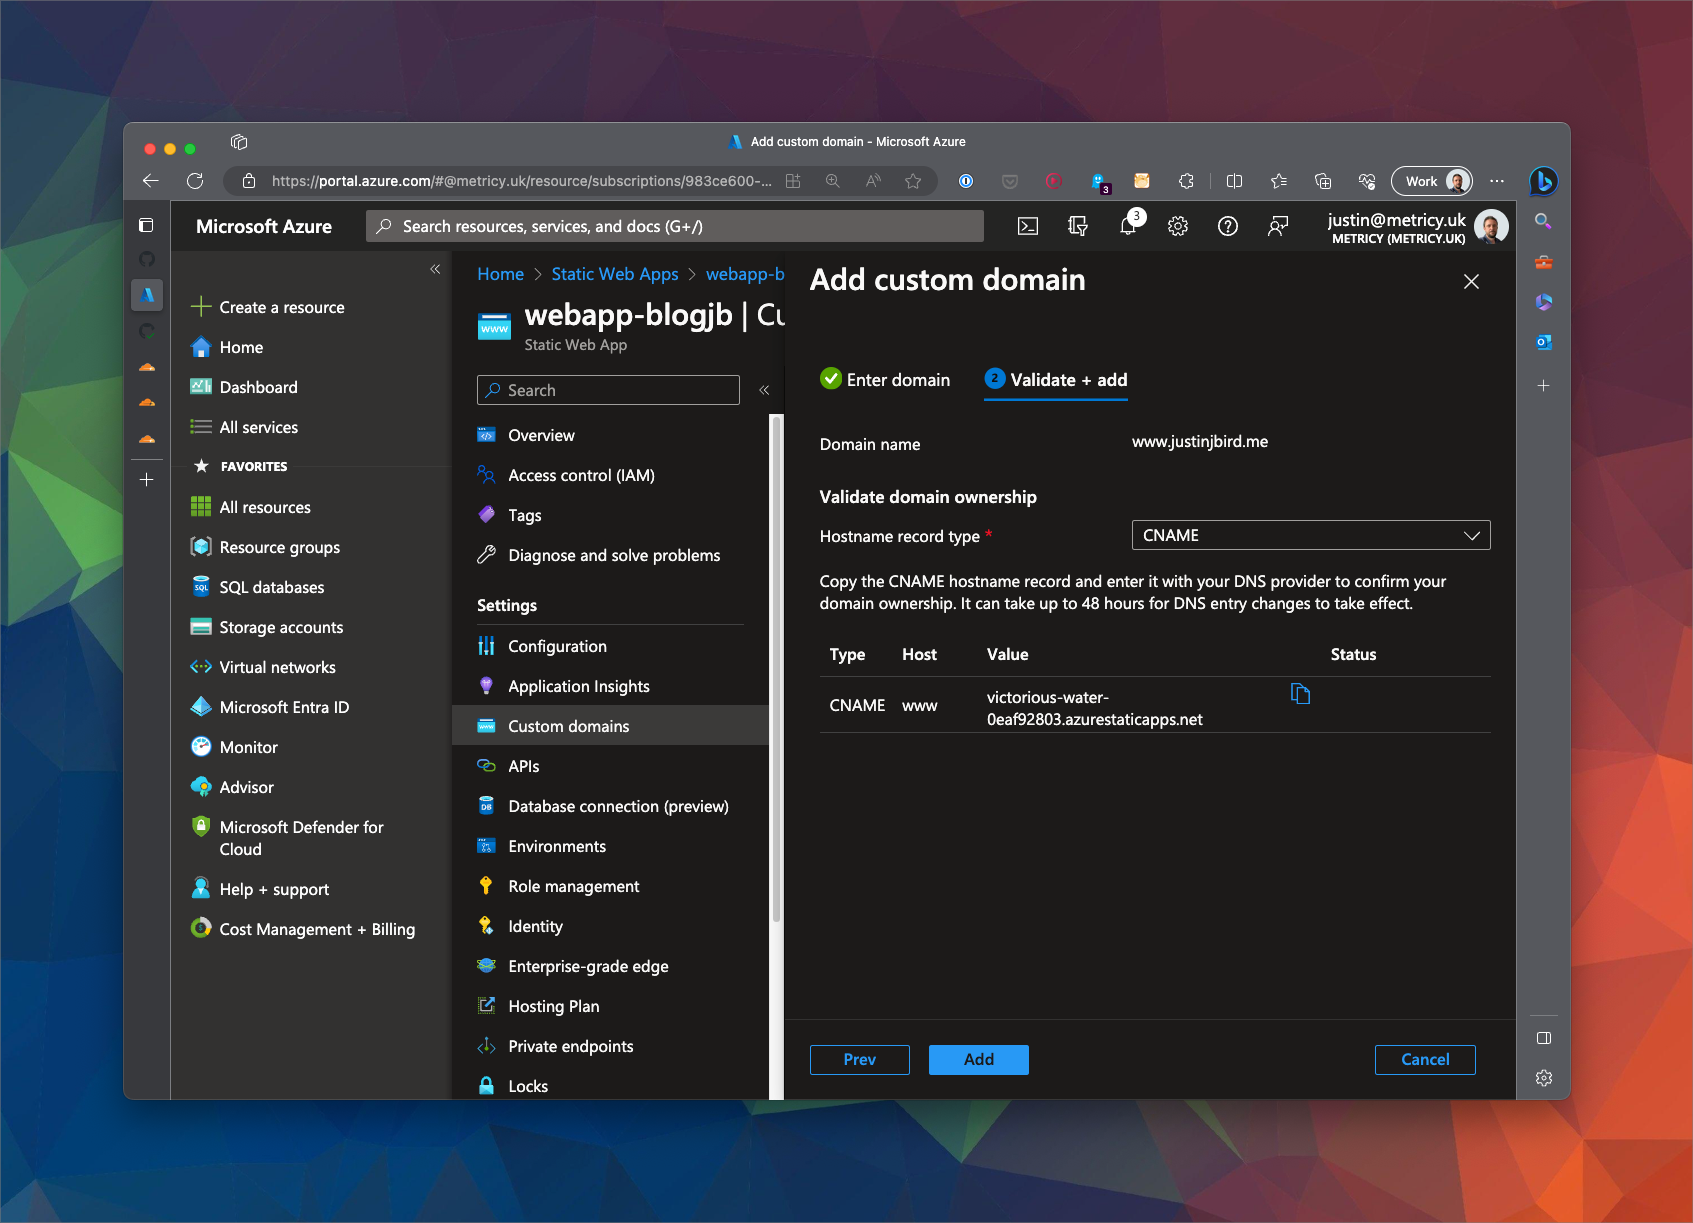
Once you press next you will be instructed what CNAME record you need to create but since we have already done that you can just press add.
The webapp will validate your configuration and if everything has been set up properly it should be validated…
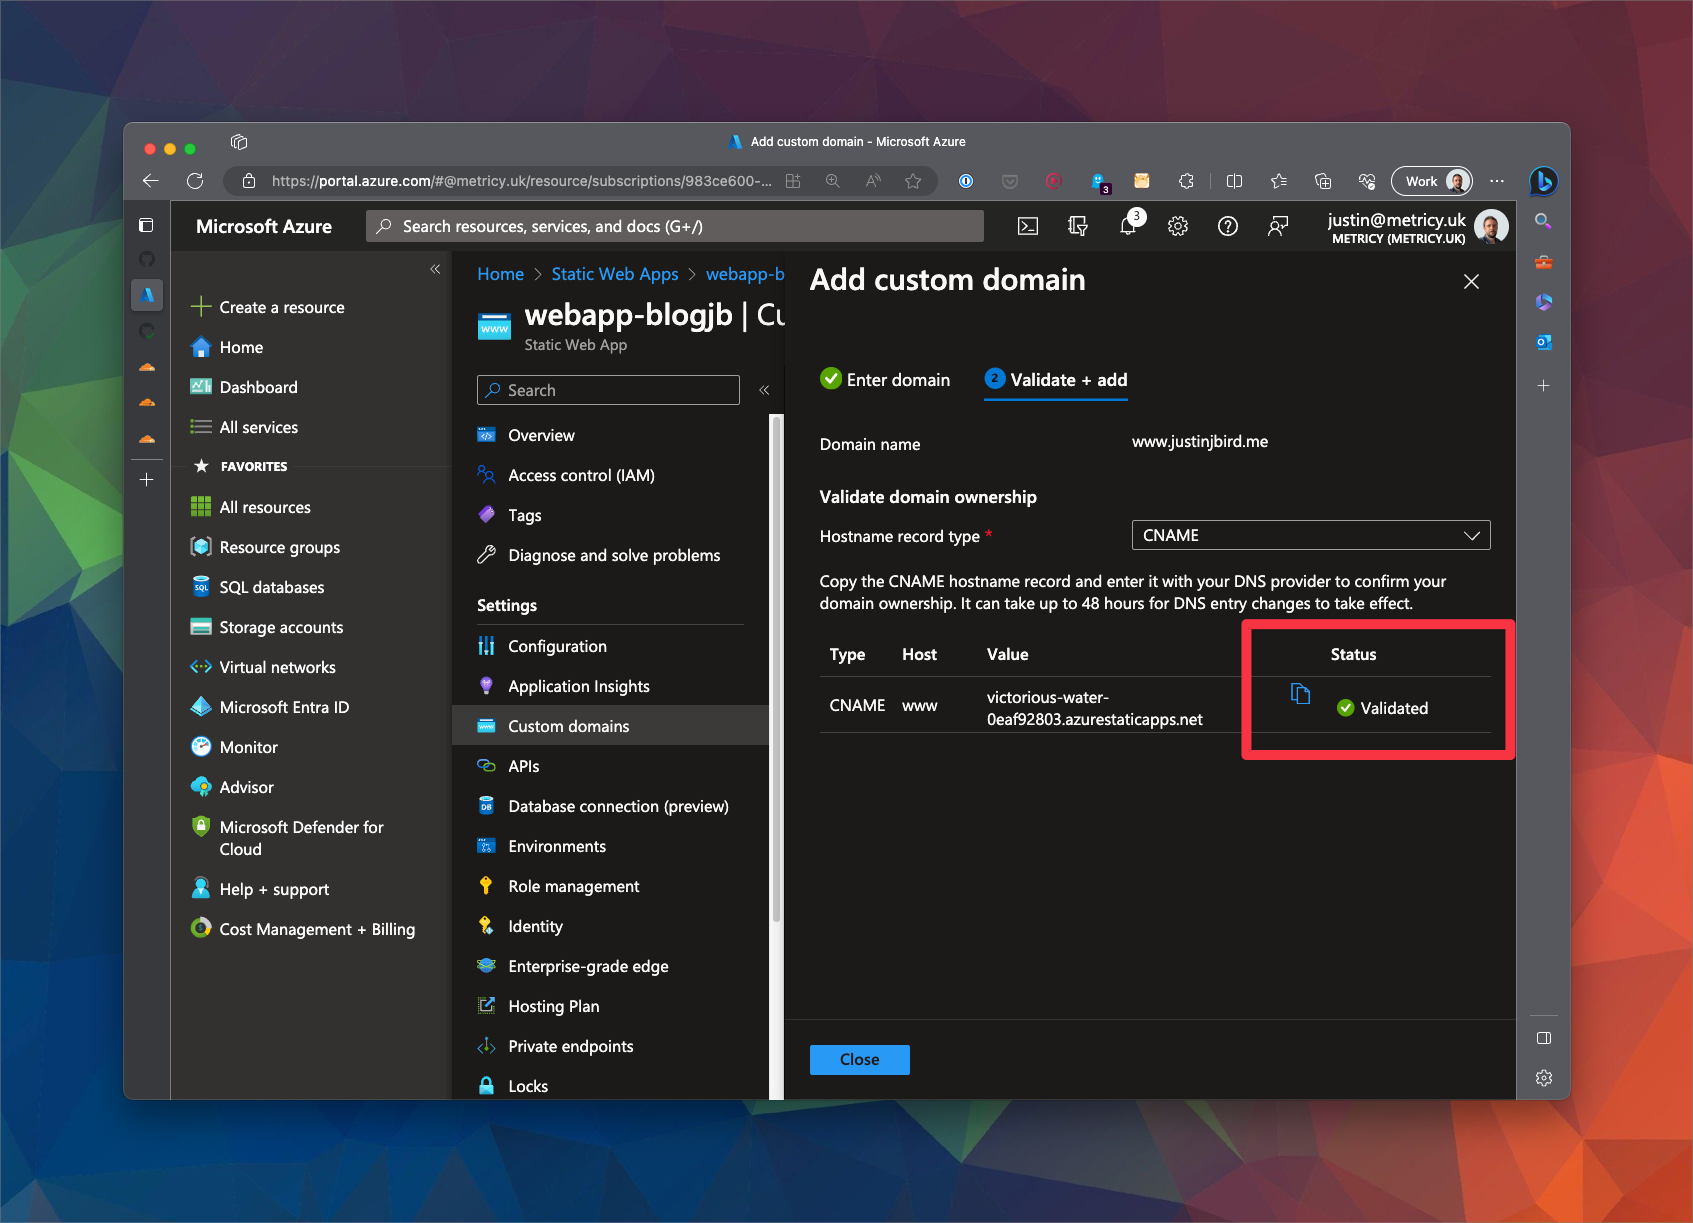
You can now close down the custom domains section.
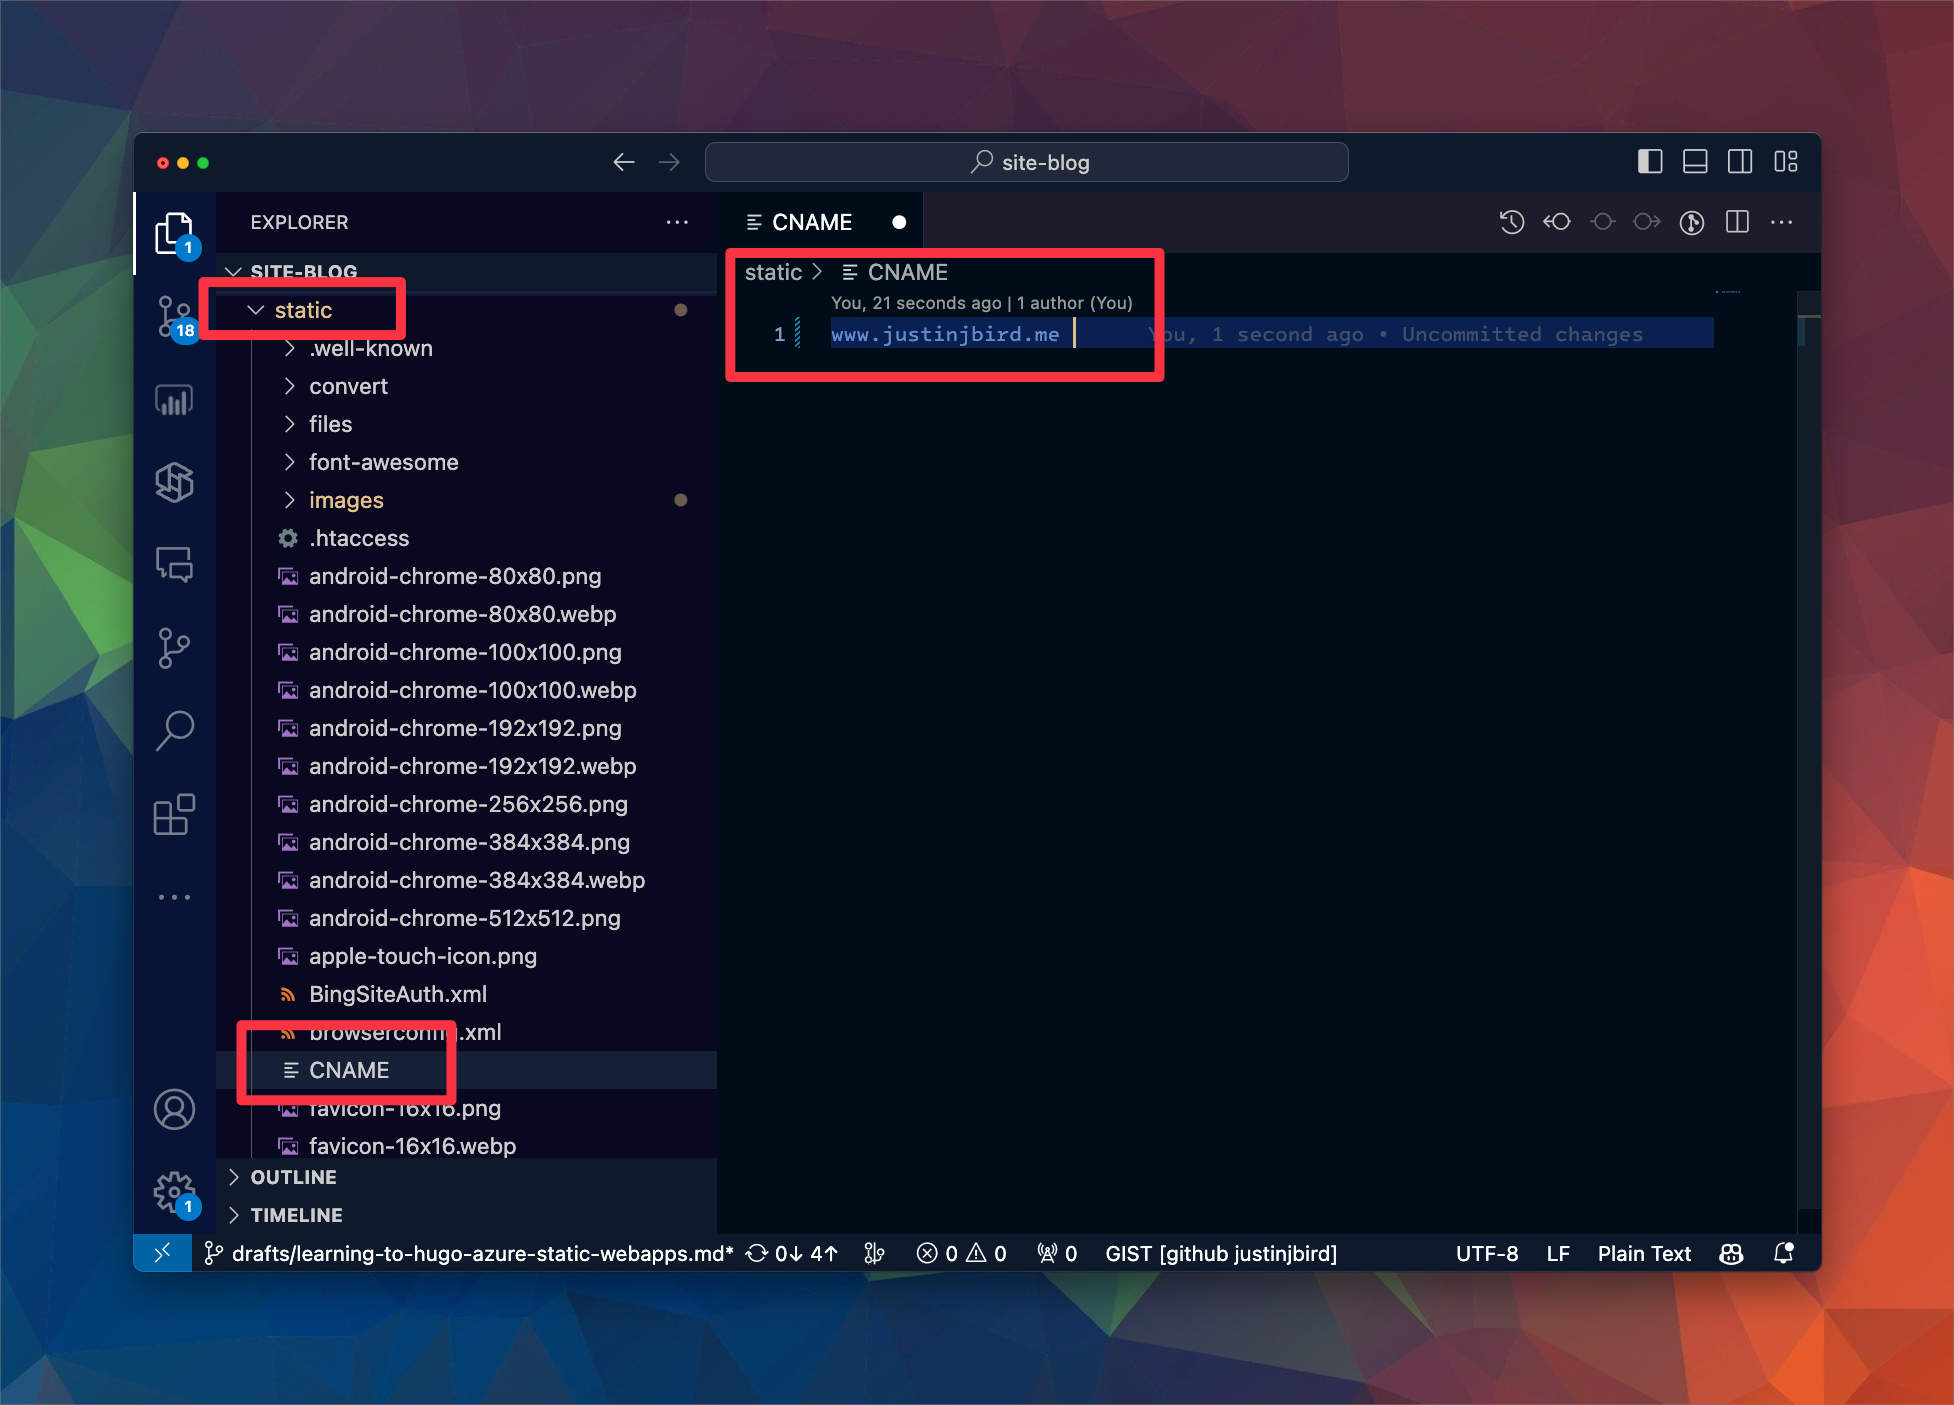
CNAME file in static folder?
I do not remember where I read this, but I also have a file in the static directory of my hugo site that is called CNAME and simply has my domain url in it. I can’t find a reference to it any more. If you know if this is required or not, please let me know.
Time to Test
Your new URL should now work. If everything is successful, both apex and www urls should direct to your site and any other urls should redirect to the same page. For example;
- https://justinjbird.me
- https://www.justinjbird.me
- https://justinjbird.me/about
- https://www.justinjbird.me/about
Summary
So now you should have the start of a nice blog site using your preferred domain name. You can now write posts in markdown and push them to your repository and they will be published to your site.
Useful links

#mtfbwy